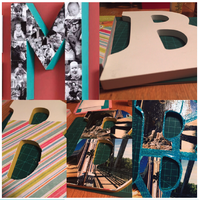
DIY Project “B”
Published: Wednesday, March 16th, 2016
I bought this letter “B” years ago and have been wondering what to do with it since then, and then I saw a DIY project someone had shared on Facebook. It looked simple enough and I had all the supplies in my craft box. For this project I used a glossed, wooden letter; Mod Podge (I used an antique matte to give the photos the same finish); some card stock paper; decorated scotch tape; an exact-o knife; a finishing spray; paint brush; and photos. To start I decided it would be easier to put the card stock down for background, so I put the letter on top of the paper and used an exact-o knife to cut around the letter. I used the Mod Podge to glue that down and also for the photos. The worst part was getting the edges right and getting the photos the way I wanted. It took me a bit to cut right too, because of the curves of the B. It definitely wasn’t as easy as the letter “M” made it seem with the photos. After everything was glued down I put another layer of Mod Podge on top of the photos. This gives it the antique effect and it also makes sure any edges or corners are glued down. After that was done, I didn’t exactly like the rough edges so I decided to use decorated scotch tape to cover the seams and the edges. Once everything was how I liked it, I used a finishing spray to seal everything against dust and aging. Overall it was a fun DIY project once you got going and I would definitely do it again! The only thing I would change if I did it again would to use a thicker brush to put the top coat of mod podge on. The brush I used left streaks which show if you look close enough. I would also add other embellishments and maybe use a bigger letter. Overall I think it is a project anyone can do and something you can definitely cater to your own interests.
Click Here To See More Stories Like This


