Bird's Nest
You’ll need:
Construction Paper
Magazine/Newspaper
Glue
Paintbrush
Scissors
Cling wrap
Bowl
I like to find craft projects where I don’t have to go out and buy a lot of the material needed and use stuff around the house. This project fit that perfectly!
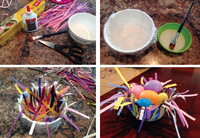
First step is to cut strips of various lengths from various types of paper.
Wrap your bowl with cling wrap. Mix a small bowl of ½ glue, ½ water. Coat the cling wrap fully with the mixture using a paintbrush. Start placing one strip of paper at a time in the bowl and brush each strip with glue mixture. Repeat this step until your bowl is fully covered with various strips of paper. Let stand over-night to dry completely.
Remove cling wrap from bowl and paper strips. You now have a fun “bird’s nest” decoration to fill with Easter eggs for a cute centerpiece on your table!
Embroidery Floss Easter Eggs
You’ll need:
Embroidery floss (multiple colors)
Water balloons
Glue
Scissors
Bowl
I have a 10 year old and 5 year old and they both enjoyed this project thoroughly! I believe getting their hands full of slimy glue had something to do with it, but nevertheless they enjoyed the craft and especially the end result.
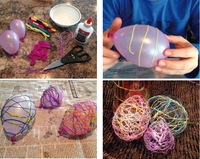
Select the colors you want for your “egg”. The more the merrier. I cut 2 ft. strips which seems to be easy to manage when putting the project together. Then, blow up as many water balloons as you would like. These make the perfect “egg” shape for this project. Next, you will want to make a small bowl of ½ glue and ½ water mixture. Take 1 strand of embroidery floss and completely submerge it in the glue mixture. When you start removing it, pinch the floss lightly to remove excess glue. Start to wrap the floss around the balloon in all different directions. Repeat this process until the balloon is mostly covered. Let the project dry overnight.
The next morning, use a pin to pop the balloon and remove the fragments through an opening between the floss. This craft can be used as a centerpiece in a basket or hung with string.
Easter Candy Pouches
You’ll need:
Yarn
Construction paper
Single-hole punch
Black marker
Scissors
Glue stick
Assorted candies
This craft is really fun for the kids to make and to also receive! I host Easter each year so this will be a little something to hand out to all of the kiddos before they leave as an extra treat.
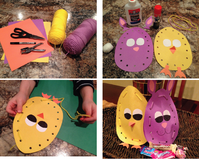
First take one sheet of construction paper and fold it in half. Draw an oval on one side and cut so you will have two equally sized ovals for the body of the project. Depending on what animal you are making, this is also the time to make the eyes, ears, feet, etc. Be as creative as you like here! Take the single-hole punch and make the holes around the edges. Be sure to make an even number of holes so you can tie the project off in the back. Glue all of the project’s embellishments at this time to the body. Cut a length of yarn to use for lacing your project. Leave an opening at the top and put in your candy. Once you have all the candy inserted, continue lacing and tie a knot in the back.


